How to colorize black-and-white photos
Updated · 6 min read
Restore first, then colorize. AI colorization turns a black-and-white photo into a natural-looking color picture in seconds, but the colors are an educated guess — the photo itself holds only shades of grey. Fix scratches and fading first, check the colors you know (a blue uniform, red hair), and always keep the black-and-white original.
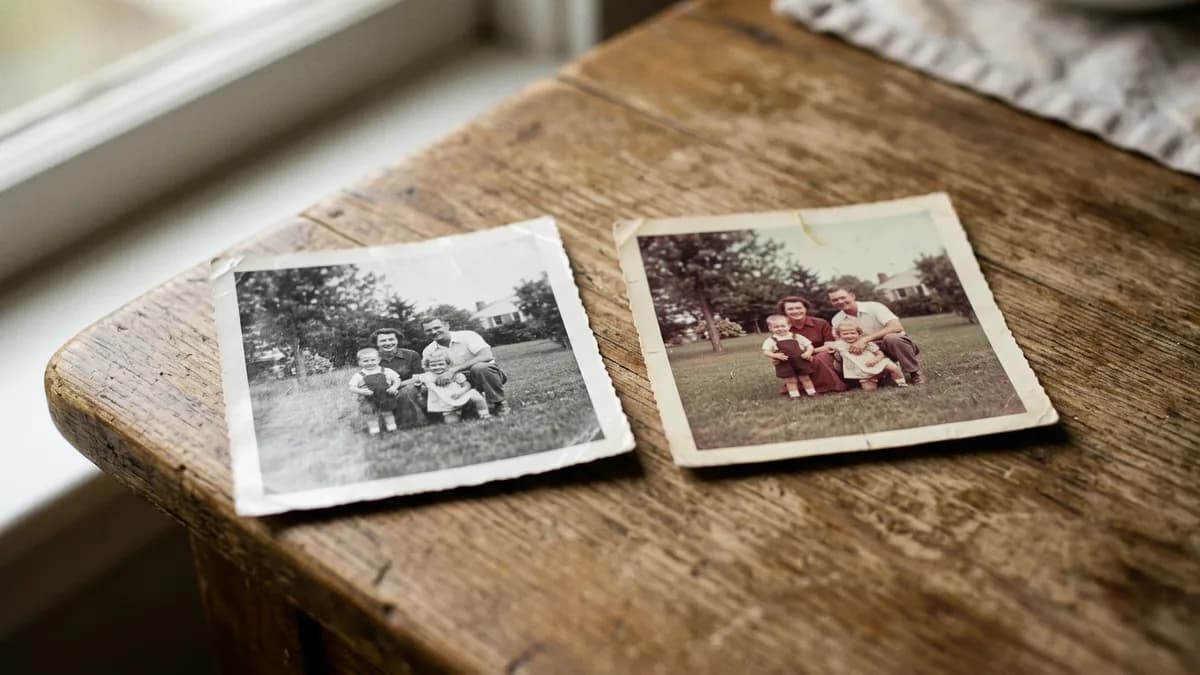
How colorization works
A black-and-white photo records how light or dark each part of the scene was, not its color. A light grey can be a pale blue dress, a yellow one or a pink one. Colorization fills that in from context: a model trained on millions of color photos recognises skin, sky, grass, wood and fabric, and predicts the most likely color for each.
That is why some colors come out reliably and others don't:
- Usually right: skin tones, sky, foliage, wood, brick, hair in natural shades.
- A guess: clothing, cars, painted walls, flowers, anything that could have been any color.
- Unknowable from the photo: eye color and the exact shade of a dress or a car.
Restore before you add color
Scratches, dust spots, creases and stains get colored too — a white scratch becomes a bright streak across a face. Fading also misleads the model: a washed-out face reads as pale and comes out grey. So repair first: see our guides on creases, tears and fading.
In CreaseFix, Restore & colorize does both in one step: it repairs the photo first and then adds color.
Do it yourself or with AI
- By hand in Photoshop, GIMP or Affinity: color layers in "Color" blend mode over each area. Full control over every shade, but a portrait takes hours.
- With AI: seconds per photo, natural skin tones, good on skies and landscapes. You decide afterwards whether to keep, adjust or redo.
Many people use both: AI for the base, then a quick manual fix for the one thing they know was different — grandmother's blue coat, a red car.
Getting a result you trust
- Ask the family. Someone often remembers a dress, a car or the color of a house.
- For historical photos, check known colors: uniforms, flags and vehicles are documented.
- Look at faces at full size: skin should be even, eyes and teeth should not pick up color from the background.
- Keep the restored black-and-white version next to the colorized one.
Tip: When you share a colorized historical photo, say it is colorized. The colors are a reconstruction, and people deserve to know which parts are known.
Questions
Partly. Skin, sky and foliage are usually right; clothing, cars and painted surfaces are a guess, because a black-and-white photo holds no color information.
Yes. Scratches, stains and fading get colored too and mislead the model. Restore first, or use a tool that restores and colorizes in one step.
It shouldn't change features, only add color. Check faces at full size for uneven skin tones or color bleeding from the background.
Yes. Recolor that area by hand in a photo editor with a color layer, or keep the restored black-and-white version if the colors don't feel right.